Ultimaker CPE+ Filament
How to print with Ultimaker CPE+
Ultimaker CPE+ (co-polyester) is similar to Ultimaker CPE, but tougher and with higher temperature resistance. While Ultimaker CPE can withstand temperatures of up to 70 °C, Ultimaker CPE+ can withstand temperatures of up to 100 °C. These tips will help you get started and achieve good results with Ultimaker CPE+.
Note: The information provided here applies to Ultimaker CPE+, similar quality cannot be guaranteed with third-party filaments.
Compatibility
Ultimaker CPE+ can be used on the Ultimaker 2+ (Connect), Ultimaker 3, Ultimaker S3 and Ultimaker S5, but is not compatible with all nozzle sizes. Look at the table for a detailed overview. When printing CPE+ on printers that use print cores, you should use the AA print cores.
| Printer | Compatible print cores / nozzles |
| Ultimaker S5 (Pro Bundle) | AA 0.4, AA 0.8 (experimental) |
| Ultimaker S3 | AA 0.4, AA 0.8 (experimental) |
| Ultimaker 3 (Extended) | AA 0.4, AA 0.8 (experimental) |
| Ultimaker 2+ Connect | 0.4, 0.6, 0.8 |
| Ultimaker 2+ (Extended) | 0.4, 0.6, 0.8 |
Tip: The combination of CPE+ using an AA 0.8 print core is an experimental combination. It has a material profile that can be selected in Ultimaker Cura. However, more complicated prints, with tiny features or a large build plate surface, may show increased warpage or oozing. In these cases, the print core 0.4 is advised.
Note: Ultimaker CPE+ is not supported on the Ultimaker 2 Go, Ultimaker 2 (Extended), Ultimaker Original+, and Ultimaker Original
Ultimaker CPE+ has optimised settings for the Ultimaker Pro Bundle, Air Manager and Material Station. This ensures a good end of filament and end of print experience in the Material Station and an optimal build environment with the Air Manager. Please make sure to use the latest version of Ultimaker Cura and ensure the firmware has the latest update.
If you use CPE+ on the Ultimaker S5, Ultimaker S3 or Ultimaker 3, you can use Breakaway as support material. Experimental use of CPE+ in combination with PVA or another color of CPE+ is also possible.
*Only possible for small prints. Larger prints may show warping of the build material. The other experimental and not supported combinations have not been verified, since limited use cases are available. Results are dependent on the model type that is used.
Recommended settings and configuration
Note: Always use the latest version of Ultimaker Cura and make sure that your 3D printer is updated with the latest firmware version to include the correct material profile for Ultimaker CPE+.
Temperatures
The recommended nozzle temperature for Ultimaker CPE+ is 250-275 °C, depending on the printer and nozzle size, and the material requires a build plate temperature of around 110 °C.
Note: The correct temperatures are automatically used based on the printer, nozzle size, and profile you select in Ultimaker Cura.
Adhesion
Ultimaker CPE+ is prone to warpage and layer splitting. The use of good adhesion is essential for the best print quality and glass plate protection.
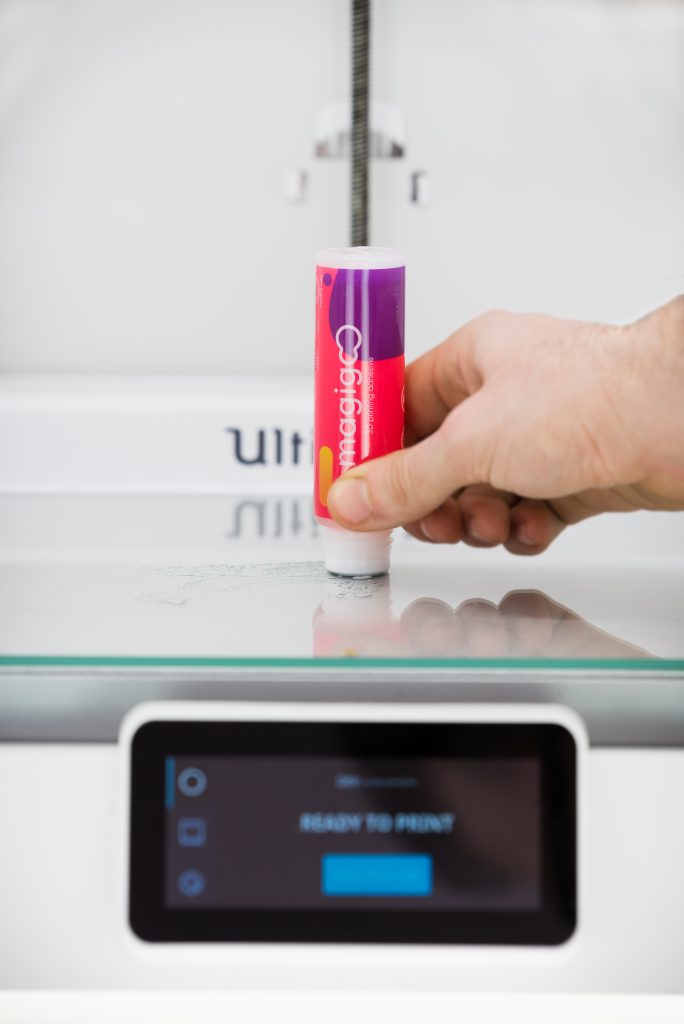
We recommend using glue on the Ultimaker S5 and Ultimaker 3, and adhesion sheets on the Ultimaker 2+ to achieve reliable adhesion to the build plate. In addition to their adhesive properties, glue or adhesion sheets serve as a protective layer for the glass plate. Not using glue or adhesion sheets results in a high risk of chipping the glass plate when removing the print.
To minimize warping when printing more complex prints with Ultimaker CPE+, it is recommended to apply a thin layer of Magigoo original glue to the glass plate.
Caution: The addition of glue is recommended to improve adhesion and thereby prevent the chance of print failure and printer damage. Additionally, the use of glue can prevent overadhesion that can lead to damage to the build plate.
In Ultimaker Cura profiles for CPE+, the build plate adhesion type is set to a brim for the Ultimaker S5, Ultimaker S3 and Ultimaker 3 and raft for the Ultimaker 2+. A brim is made of a few extra printed lines around the 3D print on the initial layer to ensure better adhesion and avoid warping. A raft puts a grid structure between the 3D print and build plate that allows for better adhesion. The raft will also allow even distribution of temperature through the initial layers of the 3D print.
After the 3D print is finished, it can be removed from the build plate. If you printed your model with a raft, it is easier to remove the raft while the build plate is still warm.
For more tips on how to improve the build plate adhesion, see our build plate adhesion guide.
Print environment
Printing in a stable environment is important when using CPE+. It works well on the Ultimaker S5 because of the glass doors, and on the Ultimaker 3 and Ultimaker 2+ it is highly recommended to use the front enclosure of the Advanced 3D Printing Kit. Both the glass doors and front enclosure ensure a controlled environment inside the 3D printer, with a stable temperature of about 45 ºC. This provides a higher print success rate, and better quality and performance of the printed parts.
Health and safety
The Ultimaker CPE+ emits a low level of gases and particles when 3D printed in accordance with the temperatures in the table above. To ensure a comfortable and healthy working environment, we recommend 3D printing in a well-ventilated area.


